Install Act
Let’s install the Act on your registered device and check the operation.
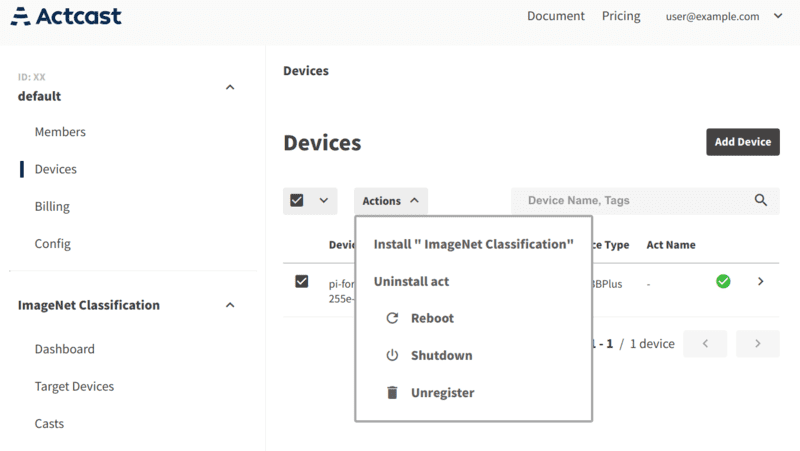
Select a device and perform installation
Select a device you want to install an Act on, and click Manage Installation of Act on the Actions menu.
Select ImageNet Classification and press the Install button to start the installation.
It takes some time for Act to start working after installation on devices.
Wait patiently until the (installing) disappears on the Devices screen.
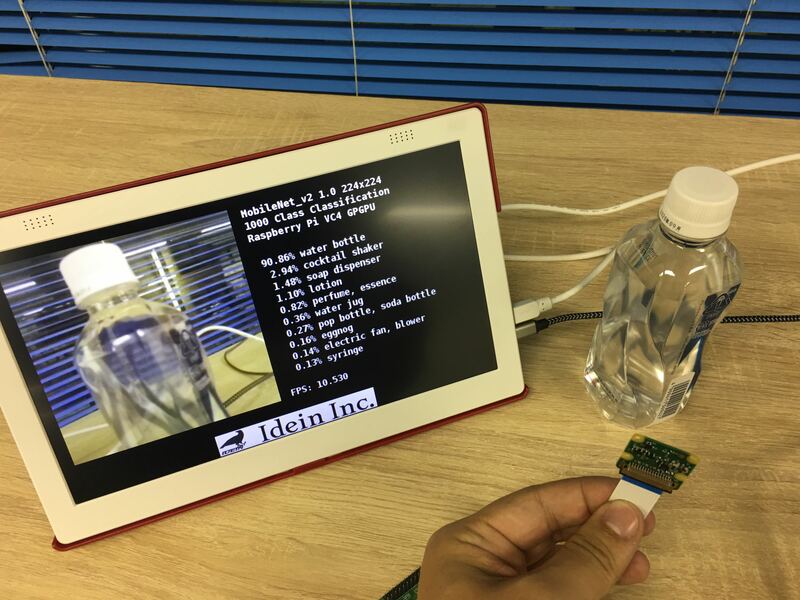
If you have a display connected, you can see on the display that Act has started working.
In case of troubles at the Act start-up
ImageNet Classification is an Act that requires a camera,
so it doesn’t start if a camera is not connected.
check your camera is connected.
Operation check
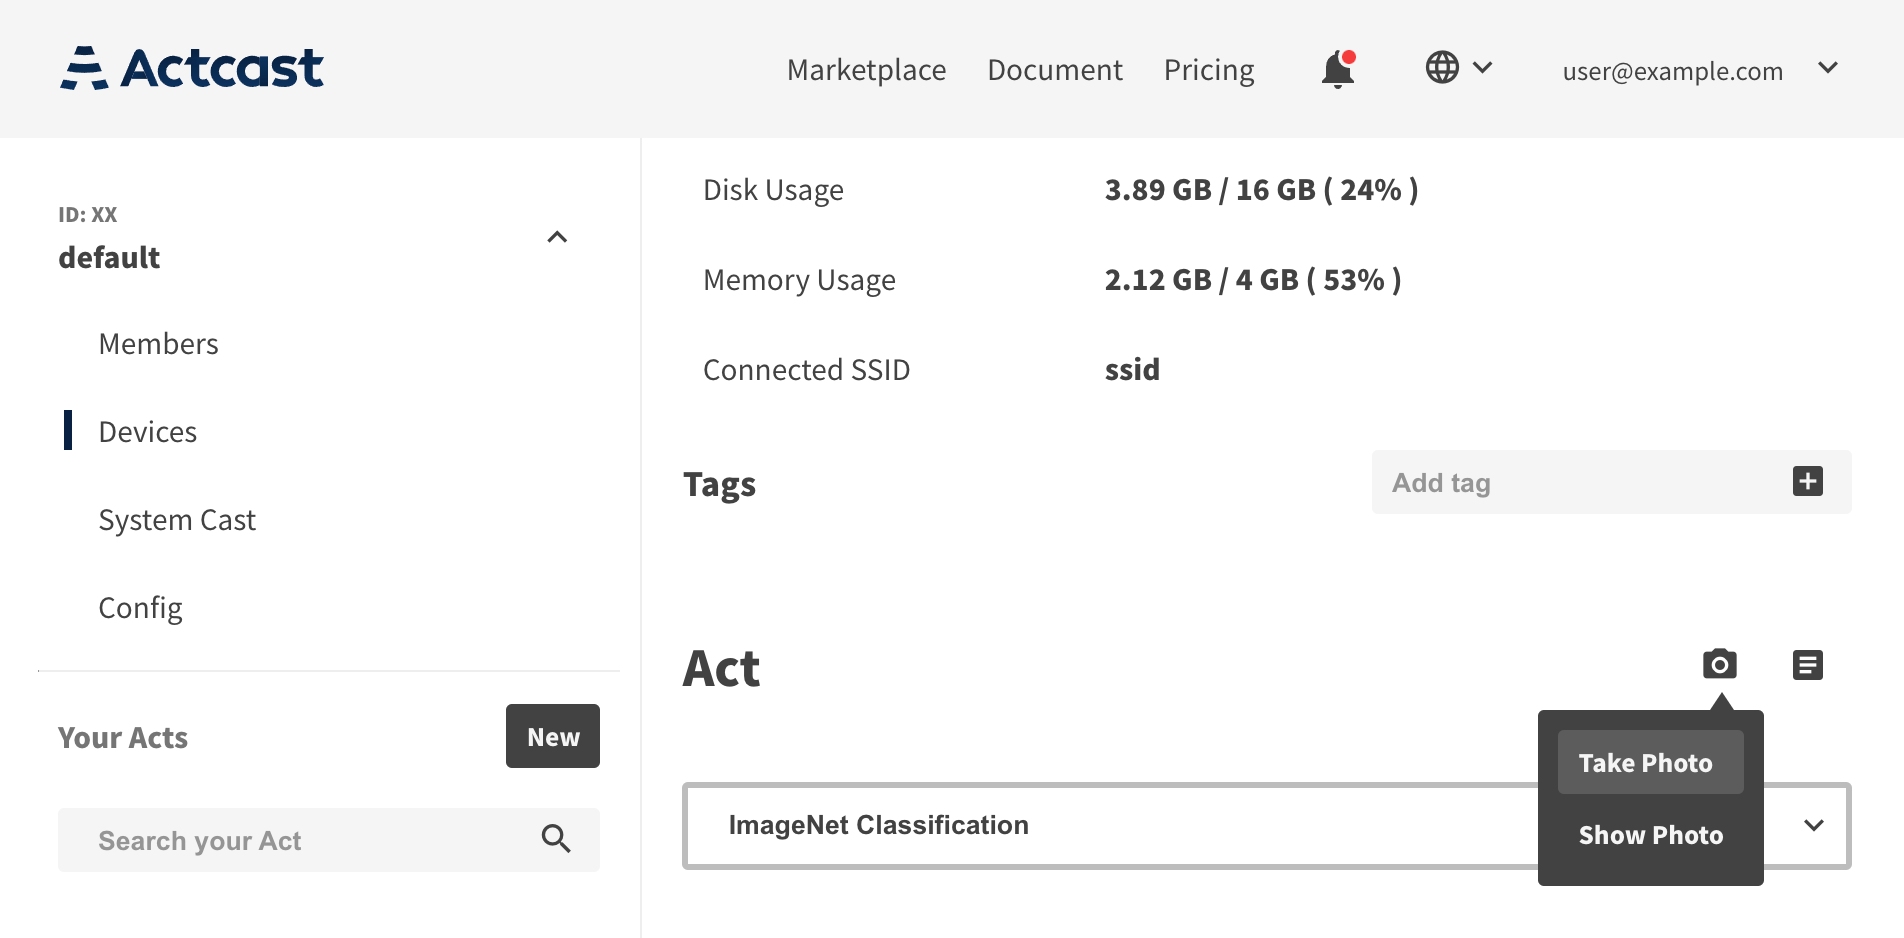
For applications that use a camera, you can remotely operate the camera connected to the device and check the shooting results (images) on the Web.
This is called the Take Photo function.
Select a device on the Devices page to go to the Device Details page and run Take Photo from the camera icon menu.
If an image is displayed, the camera is working properly.
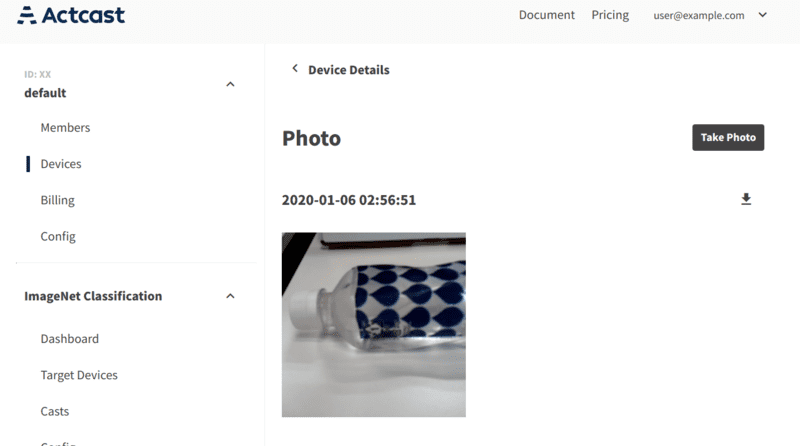
The image will be deleted a day after took.
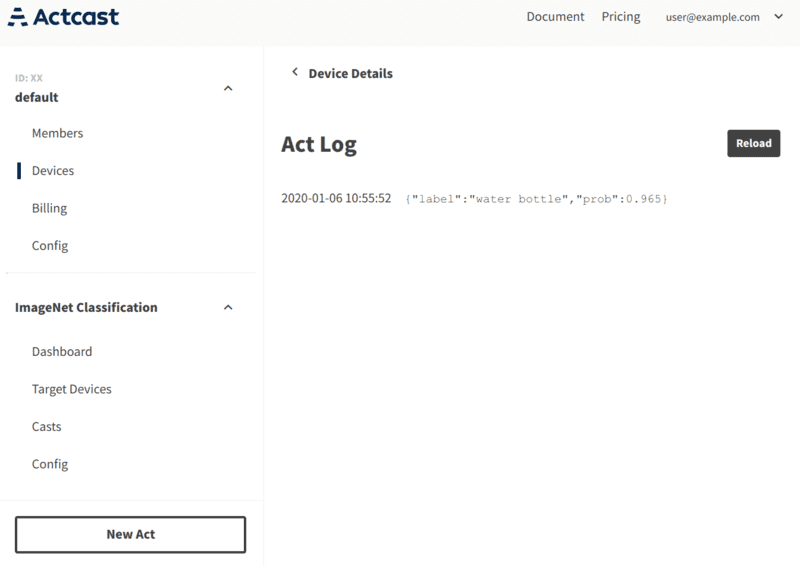
We will now verify that the computation results are sent to Actcast.
You can view logs sent by an Act by selecting Show Act Log from the icon to the right of the camera button on Device Details.
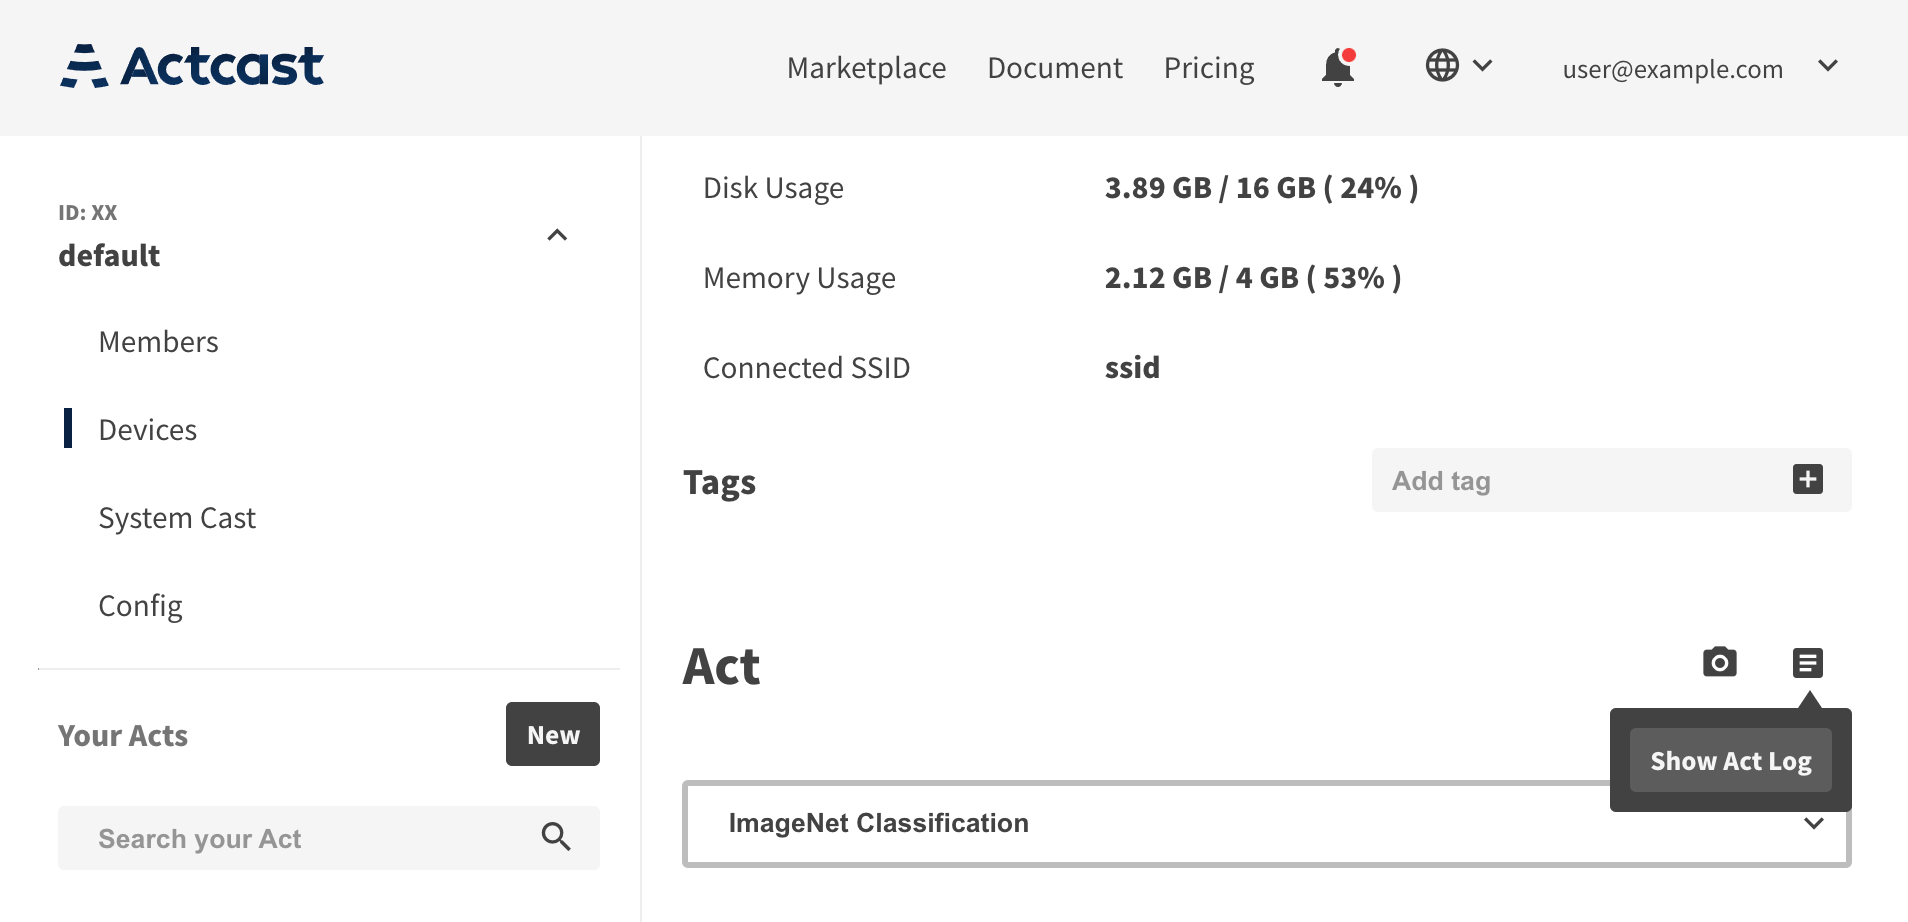
Now, place things around you (keyboard, banana, etc.) in front of the camera and check the recognition result. By default, results are sent to Actcast when objects are recognized with a probability of 90% or more.
Next: Cast
Previous: Create Act, ImageNet Classification