Setup Actsim on ai cast
The setup method varies depending on the target OS version of the app you are creating.
Creating an app for Actcast OS 1 and Actcast OS 2
-
We use the following environments to set up.
- ai cast
- PC ( OS )
- Windows 11 Pro
- Cable to connect PC and ai cast
- Anker PowerLine+ USB-C & USB-A 3.0 cable
- Software ( Please refer to the respective URLs for installation instructions for each software. )
- rpiboot
- Click here for Windows users
- Click here for Linux / macOS users
- Raspberry Pi Imager
- rpiboot
-
Start rpiboot on PC.
-
Set the switch on the side of the ai cast to BOOT.
-
Connect the ai cast to the PC with a cable.
-
Connect the power cable to the ai cast and switch it on.
-
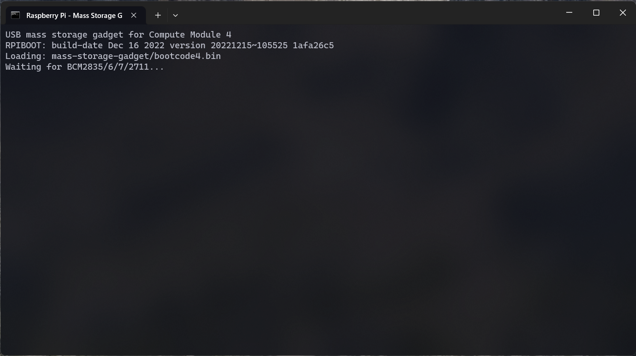
Make sure that the eMMC on the ai cast is recognized.
- If it is not recognized, please change the USB cable connecting the PC and ai cast to a recommended one, or try using a Type-A to Type-A cable.
-
Download and unzip the ActDK on a PC according to the method described in Actcast Documents : Download ActDK.
-
Start the Raspberry Pi Imager on the PC.
-
Format the eMMC with Raspberry Pi Imager. Select Operating System > Erase, select the target storage for ai cast, and press Write.
-
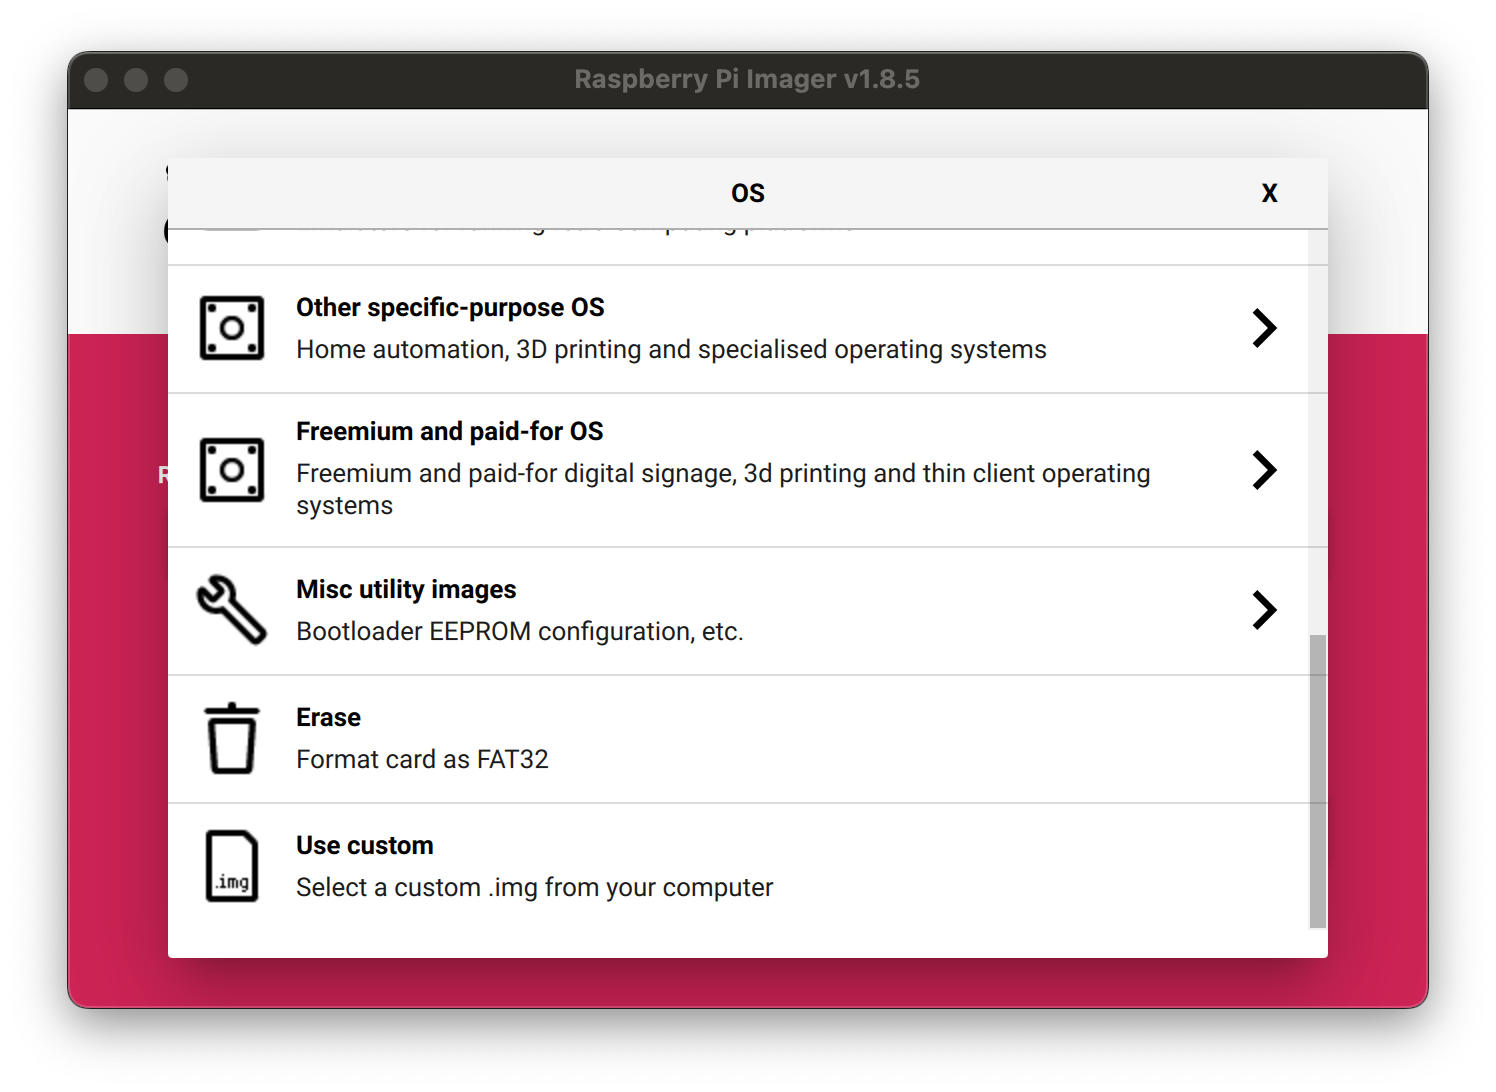
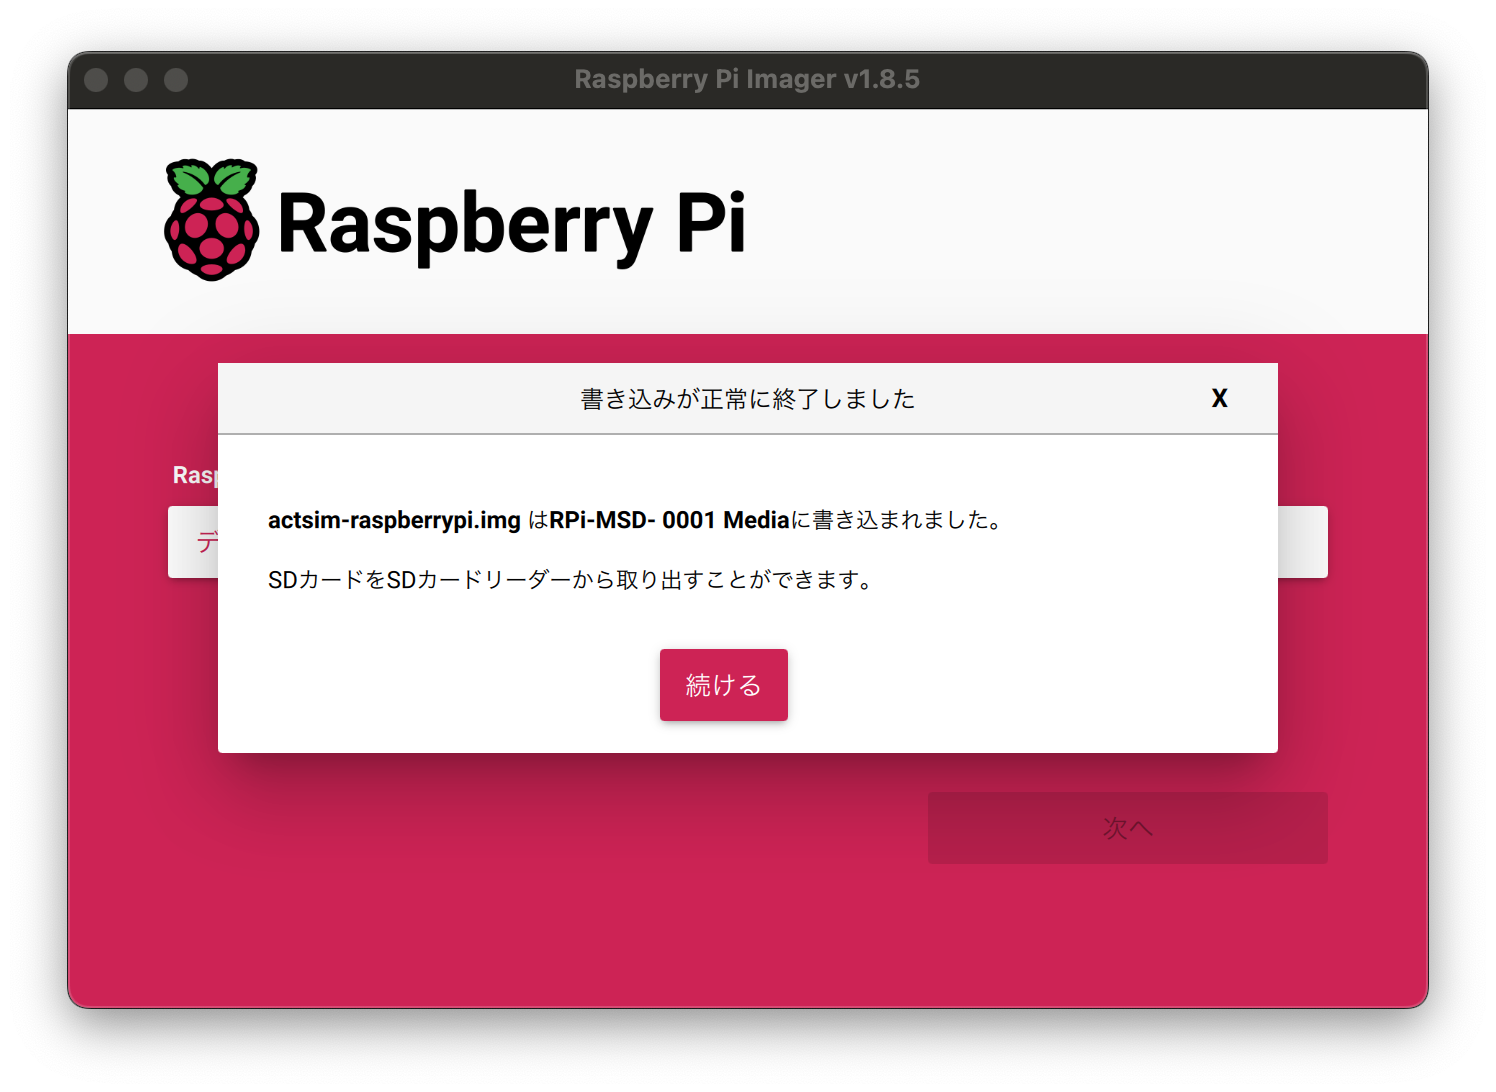
Select actsim-raspberrypi.img included in the ActDK directory extracted above from OS > Use Custom Image with Raspberry Pi Imager, select the target storage for ai cast, and press Write. Confirm that writing completes without any errors.
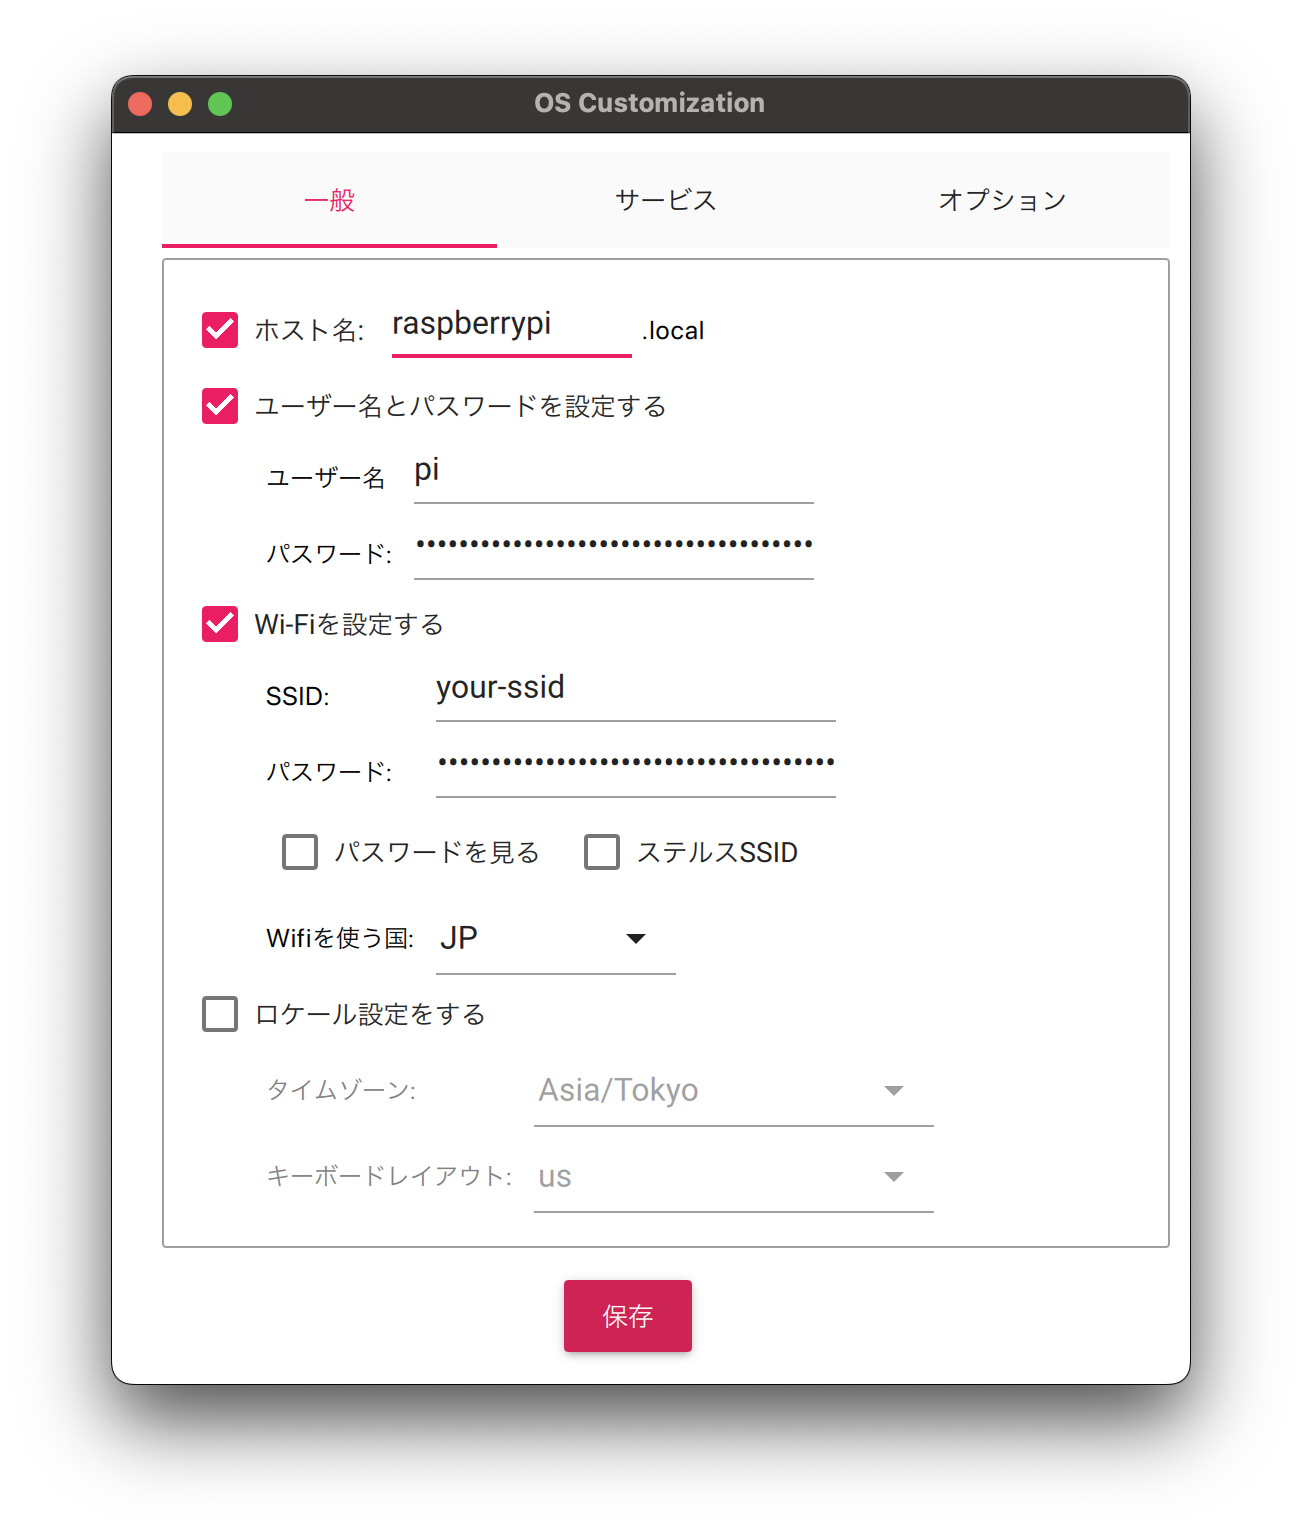
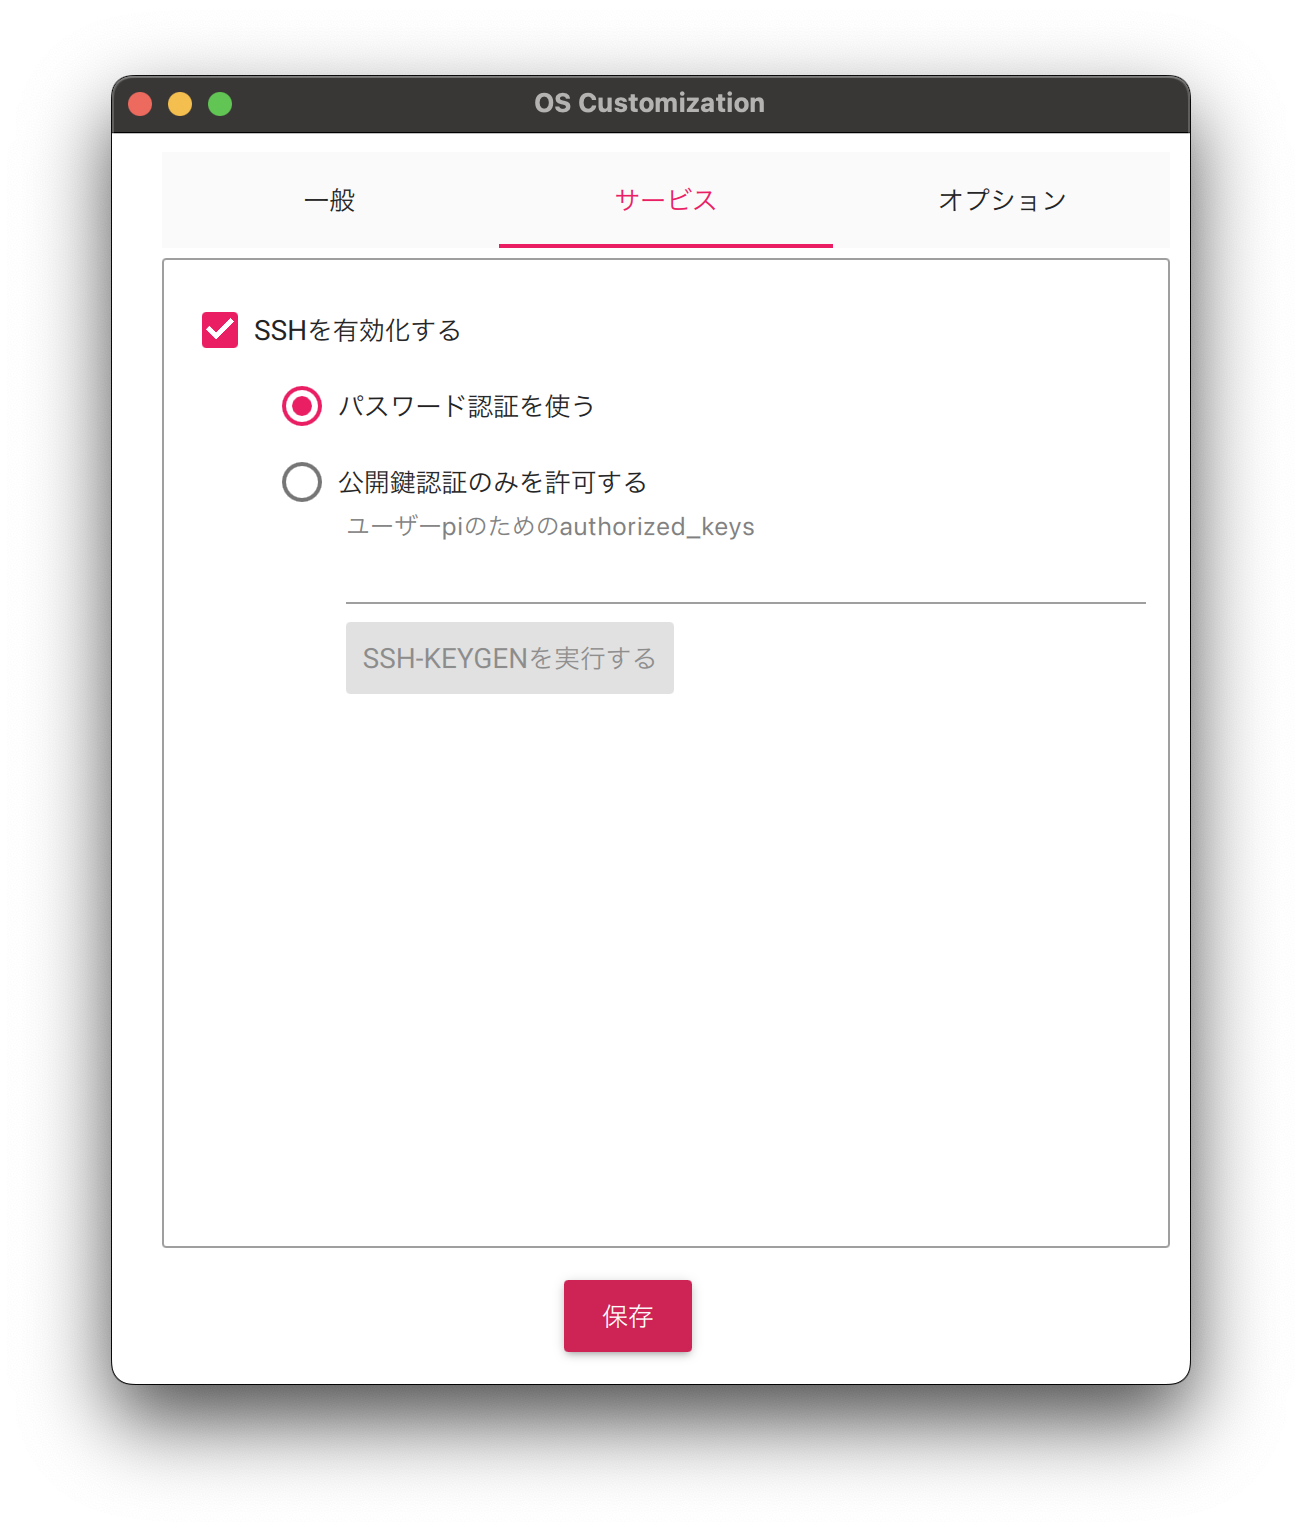
If you use Wi-Fi, please set it from EDIT SETTINGS.
Other options are set as follows:
- hostname: raspberrypi
- username: pi
- password: raspberry
- Enable SSH: enabled (select ‘Use password authentication’)
-
Disconnect the cables and power cable connecting the PC and the ai cast.
-
Release the switch on the side of the ai cast from BOOT.
-
Connect the power cable to the ai cast and switch it on.
-
SSH to the ai cast.
- As described in the Actcast Documents : Accessing to Actsim, The image is set to the same username, password, and hostname (pi, raspberry, raspberrypi) as Raspbian provided by the official Raspberry Pi website.
- If you are developing on WSL (Windows Subsystem for Linux), you may not be able to resolve the host name from Linux on WSL. In this case, you can run
Resolve-DnsName <hostname>in PowerShell to check the IP address and specify the IP address directly for SSH connection.
-
To activate the camera, run the following on ai cast to update the software.
$ sudo apt update ; sudo apt full-upgrade -
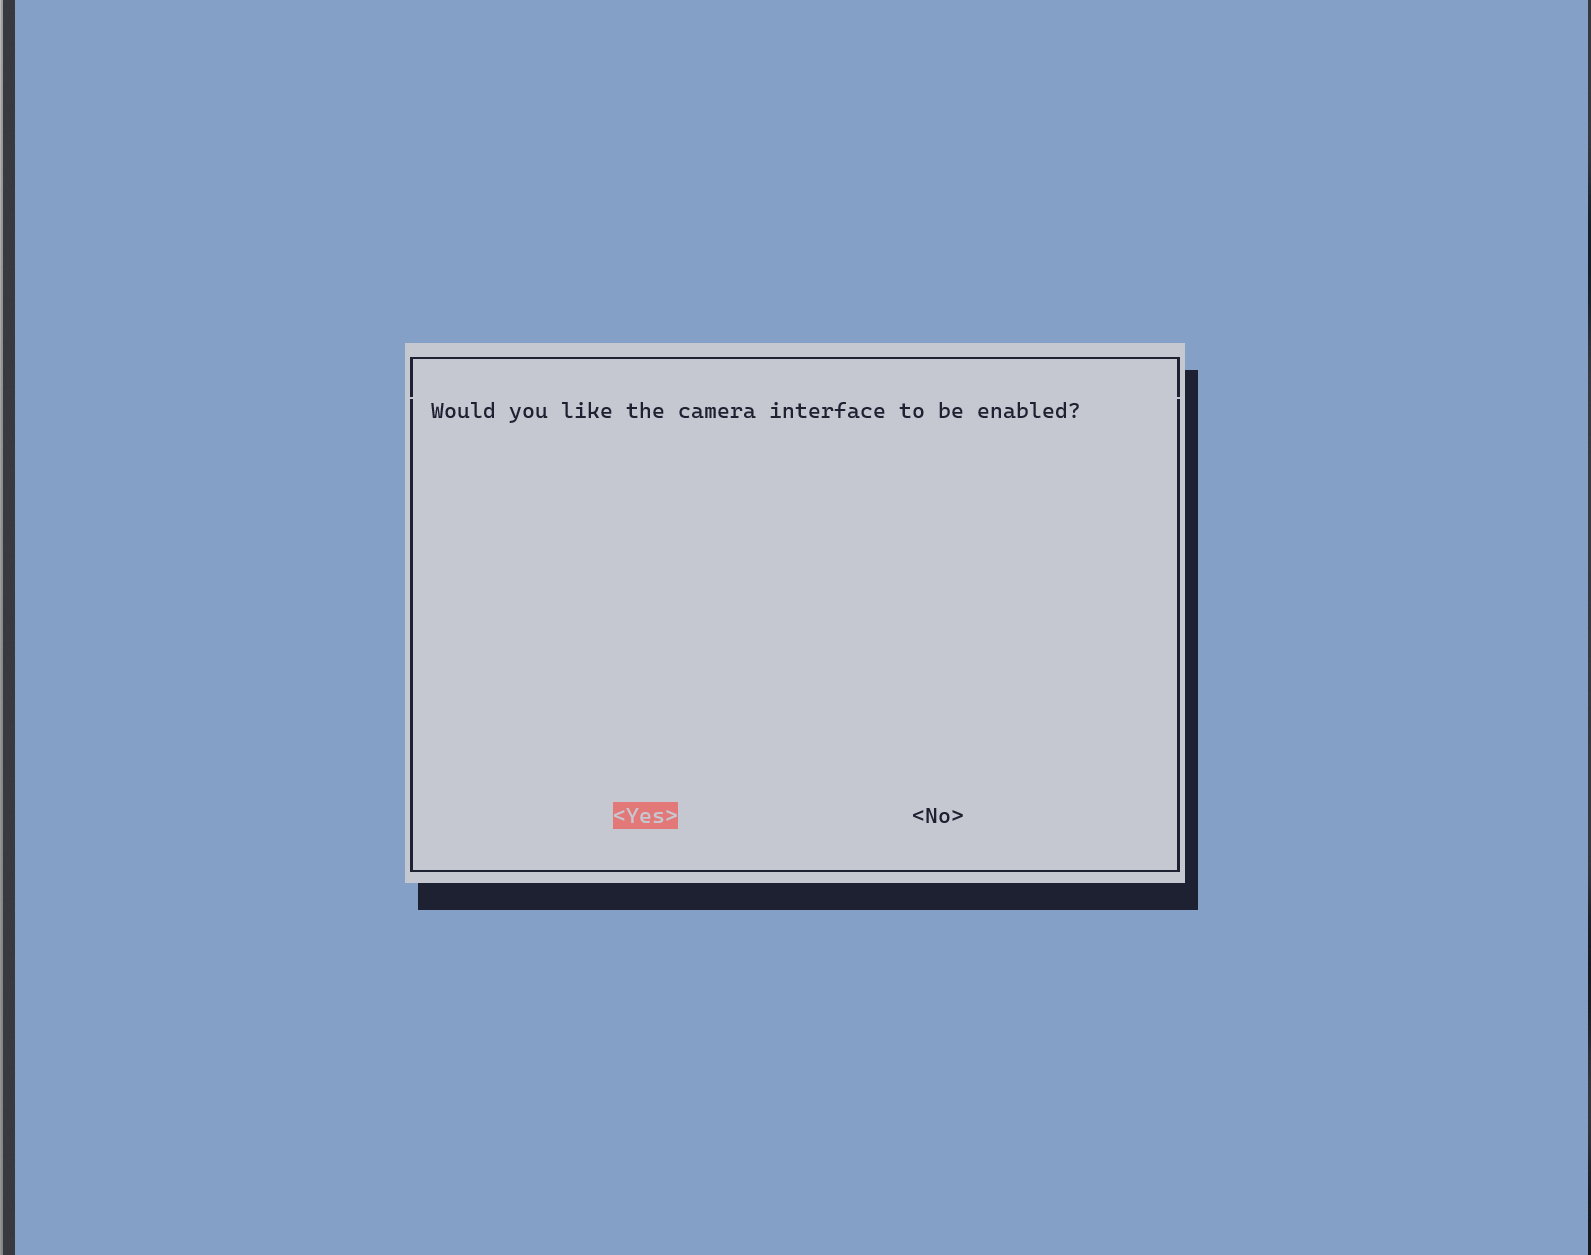
Run raspi-config to enable the camera interface.
$ sudo raspi-config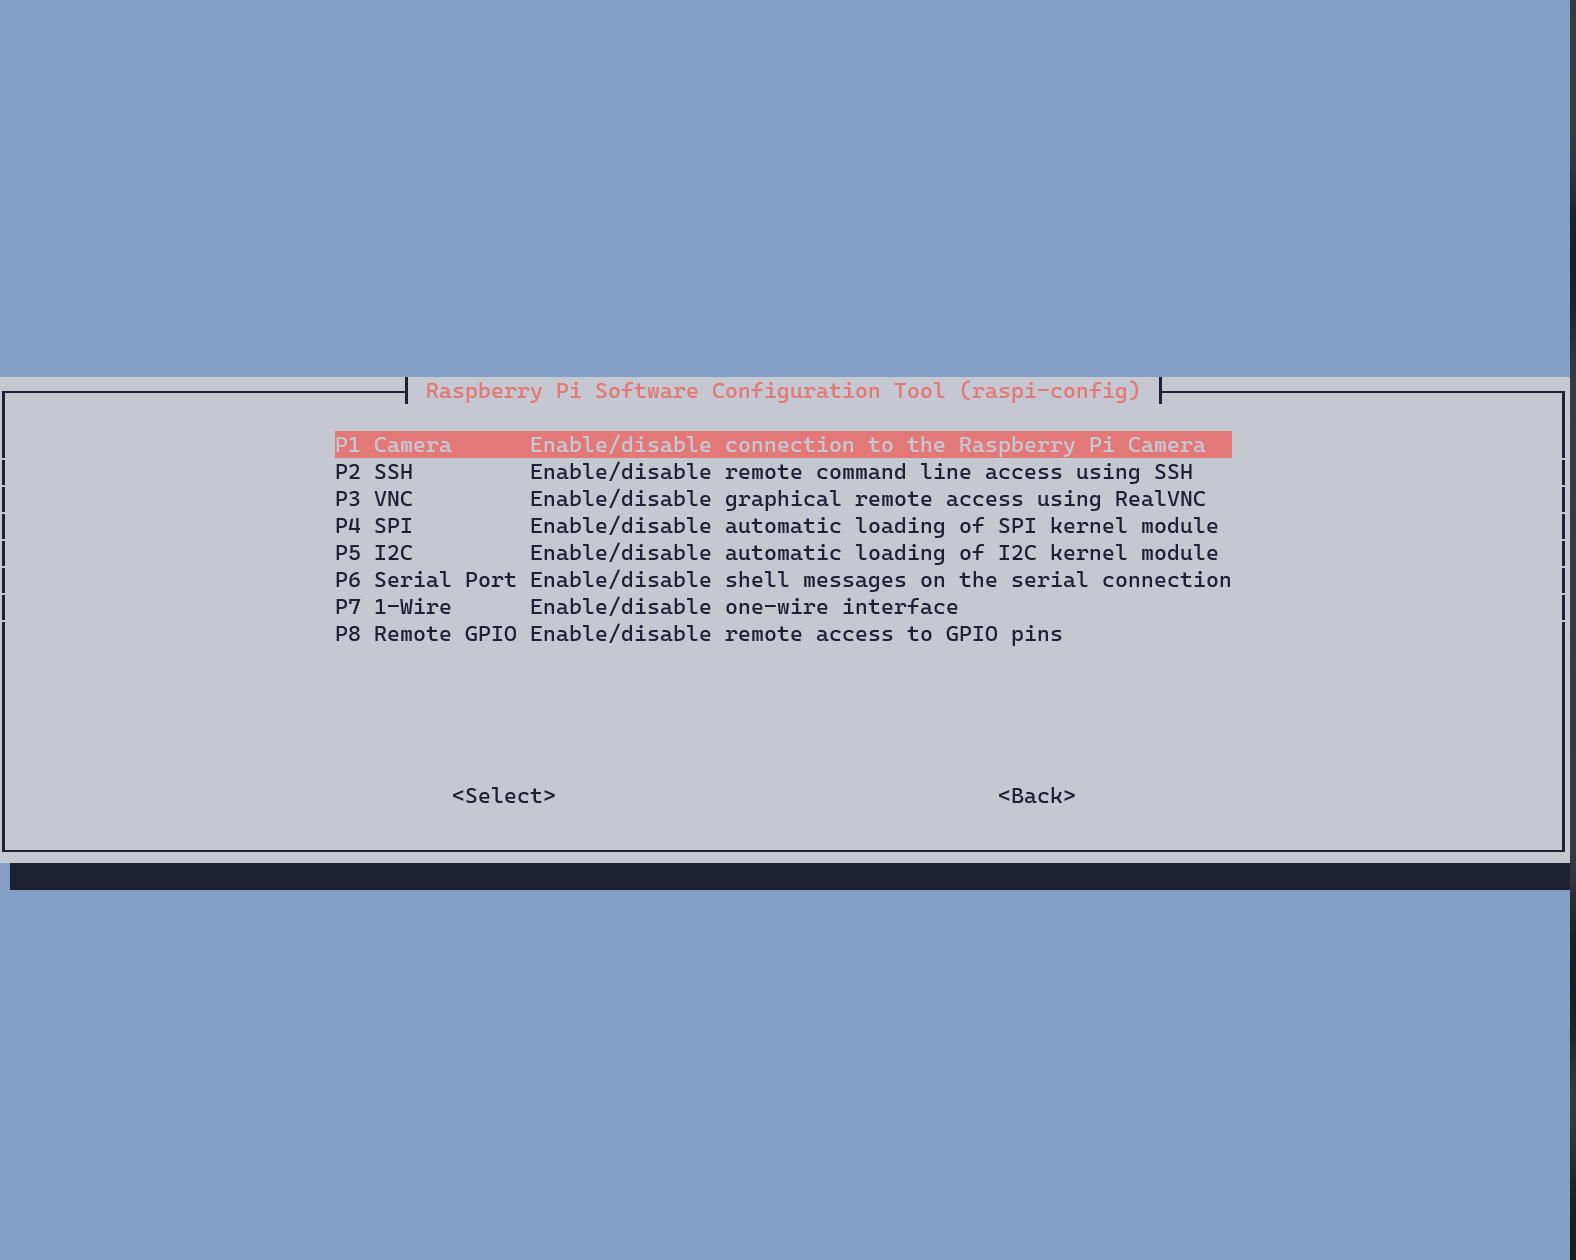
-
Add dt-blob.bin by running the following.
$ sudo wget https://datasheets.raspberrypi.com/cmio/dt-blob-cam1.bin -O /boot/dt-blob.bin -
reboot the ai cast.
$ sudo reboot -
Run the following command to install the Hailo driver.
$ sudo apt install git $ sudo apt install raspberrypi-kernel-headers $ git clone https://github.com/hailo-ai/hailort-drivers.git $ cd hailort-drivers $ git checkout v4.10.0 $ cd linux/pcie $ sed -i "s/raspi/$(hostname)/g" Kbuild $ make all $ sudo make install $ sudo modprobe hailo_pci $ cd ../../ $ ./download_firmware.sh $ sudo mkdir /lib/firmware/hailo $ sudo mv hailo8_fw.4.10.0.bin /lib/firmware/hailo/hailo8_fw.bin $ sudo cp ./linux/pcie/51-hailo-udev.rules /etc/udev/rules.d/ -
reboot the ai cast.
-
Wait for a while and SSH to the ai cast. If you can confirm that
/dev/hailo0has been created, installation is complete.$ ls /dev/hailo0 /dev/hailo0
Creating an app for Actcast OS 3
-
We use the following environments to set up.
- ai cast
- PC ( OS )
- Windows 11 Pro
- Cable to connect PC and ai cast
- Anker PowerLine+ USB-C & USB-A 3.0 cable
- Software ( Please refer to the respective URLs for installation instructions for each software. )
- rpiboot
- Click here for Windows users
- Click here for Linux / macOS users
- Raspberry Pi Imager
- rpiboot
-
Start rpiboot on PC.
-
Set the switch on the side of the ai cast to BOOT.
-
Connect the ai cast to the PC with a cable.
-
Connect the power cable to the ai cast and switch it on.
-
Make sure that the eMMC on the ai cast is recognized.
- If it is not recognized, please change the USB cable connecting the PC and ai cast to a recommended one, or try using a Type-A to Type-A cable.
-
Download and unzip the ActDK on a PC according to the method described in Actcast Documents : Download ActDK.
-
Start the Raspberry Pi Imager on the PC.
-
Format the eMMC with Raspberry Pi Imager. Select Operating System > Erase, select the target storage for ai cast, and press Write.
-
Select actsim-raspberrypi-bullseye.img included in the ActDK directory extracted above from OS > Use Custom Image with Raspberry Pi Imager, select the target storage for ai cast, and press Write. Confirm that writing completes without any errors.

If you use Wi-Fi, please set it from EDIT SETTINGS.
Other options are set as follows:
- hostname: raspberrypi
- username: pi
- password: raspberry
- Enable SSH: enabled (select ‘Use password authentication’)
-
Disconnect the cables and power cable connecting the PC and the ai cast.
-
Release the switch on the side of the ai cast from BOOT.
-
Connect the power cable to the ai cast and switch it on.